By now we hope you’ve seen the new Wonder Woman trailer because it looks like it’s going to be amazing. If not, here it is. We really hope this puts the character on the map as a superhero just as important as Batman and Superman. Look for it in theaters June 2.

As the world speculates on the outcome of the film, we can all have fun playing dress up. Wonder Woman has taken on a different look with a more armored costume than the 1970s version with Lynda Carter.
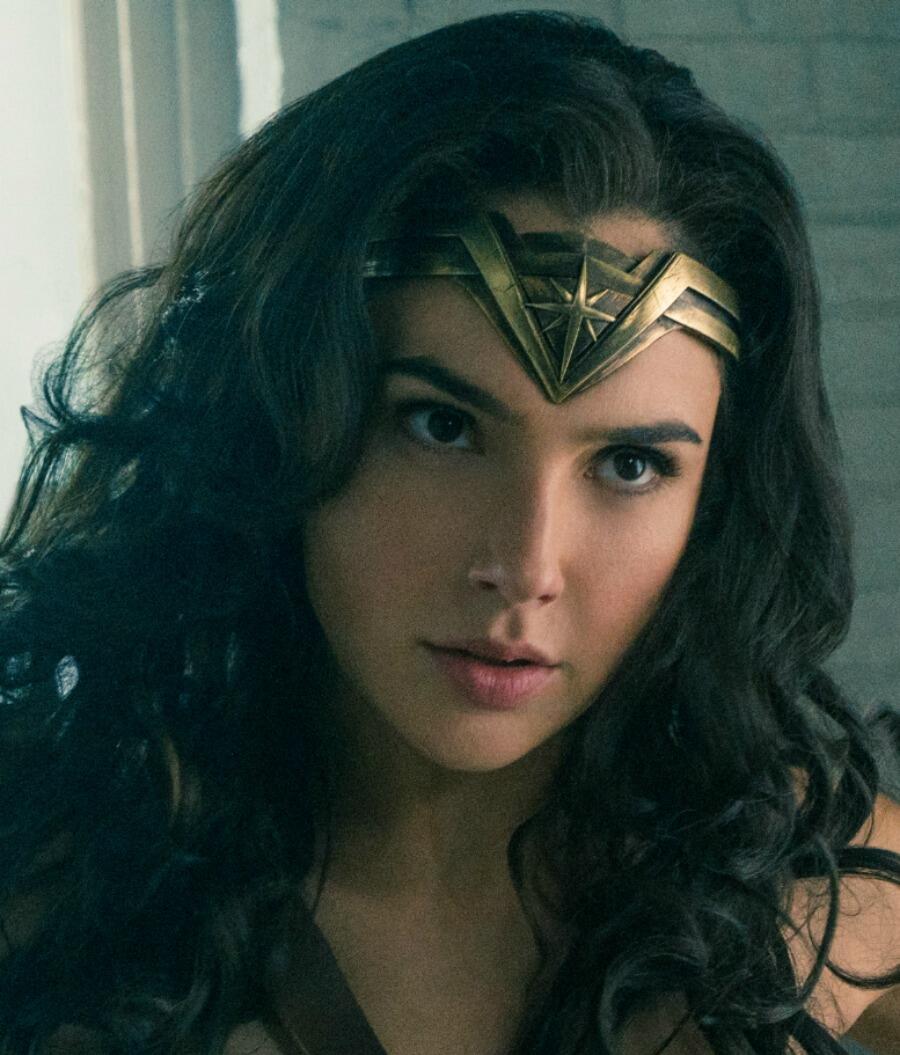
Are you all about putting together your own costumes instead of buying them? If you’re looking for a fun Halloween project to do with your little one or just want to do something fun for yourself, here’s a Wonder-ful headband and makeup tutorial to help you get started. It's a super-easy way to create a last-minute costume.

Here’s what you need:
One poster board
One sparkle paper in gold
One satin-finish copper duct tape
One (or two) strips of felt
One elastic cord
One glue gun
A pair of scissors
Curved ruler
One T-square
One pencil
One hole puncher (small)
One X-Acto knife

Before starting your project, measure the circumference of your head. The length of your band should go from ear to ear.
On your poster board, mark your measurement with a ruler. Now mark the halfway point.
Use the curved ruler and follow the measurements from your straight ruler to create an arched line.
You are going to make two strips. One strip will have an upside-down triangle in the middle.
Each strip is a half inch in width.

Cover your strips with the copper duct tape. Do this carefully with an X-Acto knife nearby, as you do not want any folds in the front. You may need to slit your tape near the edges for cleaner fold.

Your two strips should look like this. (above left)
Wonder Woman’s headband does not have glitter. But it’s Halloween, live a little! This is your costume and if you want glitter, by all means, glitter it up!
Use the same arched ruler instructions listed above to create an extra glitterful band. Except, in this case, you want to create a "v" shape in the front. If you look closely, you will see that I cut into the side of the "v" and tucked in the second band for a better grip.

Cut out a triangular shape to add to the back of your second strip. This adds a nice layer to you headband and will provide extra support for you final touch - the Polaris star. Glue all of your pieces together.
Cut out a Polaris star and glue it to the center. The star is one inch and a quarter long.

For some extra comfort, cut a strip of felt and add it to the back. Cut a hole in each edge of your band, and tie your elastic string.
Tuck the headband under your hair, and you’re ready to go! Oh, but wait. Makeup!

Gal Gadot’s palette was very smoky with lots of natural tones.
Here’s what I did:
I used L’Oreal Paris Colour Riche in Treasured Bronze for my lid and crease.
I darkened my edges lined my lids with Maybelline New York Expert Wear eye shadow in Mocha.
For my lashes, I used Urban Decay Perversion mascara.
I colored in my eyebrows with L’Oreal Brow Stylist in Medium to Dark.
For foundation, I used a combination of L’Oreal Paris Infallible Pro-matte foundation in Sun Beige and Natural Beige.
My blush was on the pink side. I used L’Oreal Paris True Match Rosy Outlook blush.
For the lips, I used Marc Jacob’s Taboo lip gloss.
Wonder Woman has a bit of highlight, so I added L’Oreal Paris True Match Lumi Powder Glow Illuminator in Rose.

Wondering what to wear with this if you don't want to go full-on metallic bustier? Try pairing it with a glitter tube top and jeans.